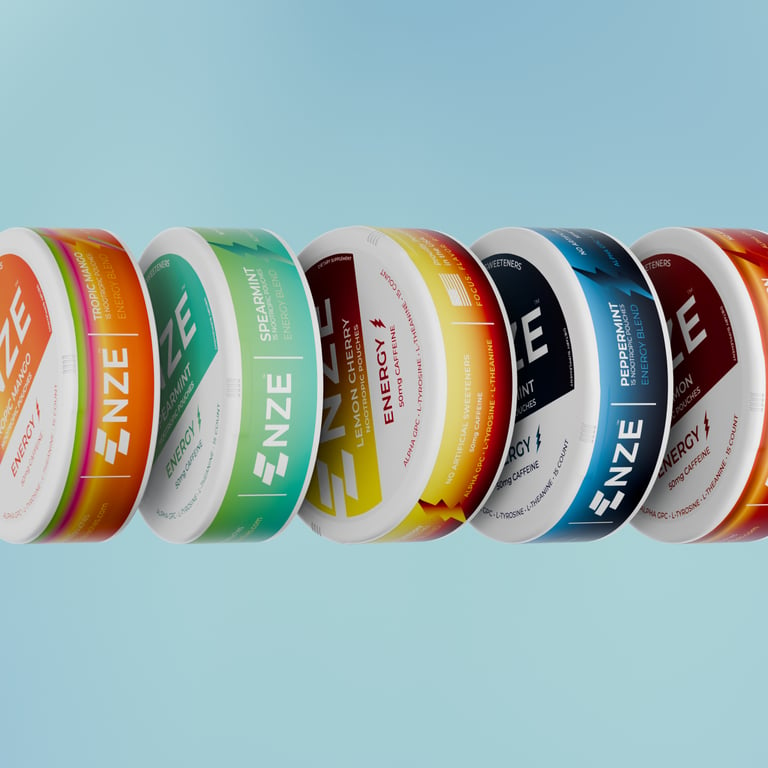
No CAD files from your manufacturer? Discover how 3D artists rebuild accurate, production-ready product models from reference photos and dimensions to create studio renders and launch animations.
What it is
Image-to-3D product visualization is the process of recreating a physical product as a clean 3D model from reference photos, sketches, or dimension sheets, then using that model for studio stills and animations.
Why it matters
Many brands and agencies do not own the CAD files for their products. A manufacturer might refuse to share STEP files, a legacy product might predate digital CAD, or an early sample might only exist physically. Assuming you need CAD files forces you into expensive photo shoots every time you want a new angle or colorway. Recreating the product from photos gives you a permanent digital twin you can re-light, animate, and update anytime.
How We do it
Gather multi-angle photos and basic dimensions. Shoot clear, well-lit photos of the front, back, left, right, top, and bottom. Stand back and use a 50mm to 85mm lens (or 2x/3x phone zoom) to avoid wide-angle distortion, and note the overall height, width, and depth.
Photograph close-up details and labels. Capture textures, ports, buttons, seams, and printed logos so the 3D artist can match every finish and brand element.
Rebuild the geometry from scratch in 3D. A 3D artist uses your photos as background guides to model the product with clean topology, accurate proportions, and proper edge bevels.
Build custom textures and shaders. High-resolution labels, screen UI, and engraved markings are mapped onto the 3D surfaces alongside physically accurate shaders for plastic, metal, glass, or fabric.
Review look-development renders. Before final production, the artist sends test renders under studio lighting so you can verify proportions, colors, and finishes against the real product.
Render final stills and animations. Once approved, you can output 4K e-commerce angles, lifestyle scenes, 360-degree spins, and feature animations just like a CAD-based workflow.
What usually goes wrong
Shooting with a wide-angle lens: Close-up phone photos on the main wide lens warp perspective, turning circles into ovals and skewing proportions.
Missing hidden angles: Sending only front hero shots forces artists to guess what the back ports, bottom feet, or side seams look like, adding extra revisions.
Using one-click AI 3D tools for commercial assets: Automated image-to-3D generators produce messy topology and blurry baked textures that break down under studio lighting or close-up camera moves.
Skipping physical measurements: Without basic height, width, and depth numbers, a product can look slightly too thick or slim next to props in a lifestyle scene.
Sending blurry label photos: Low-resolution images of packaging or button icons force artists to redraw typography manually, slowing down delivery.
How to tell if it worked
Silhouette overlay check (Immediate): Place a wireframe or clay render directly over your straight-on photos. Curves, button placements, and seam lines should align with the physical product.
Material and color match (Before final render): Compare a studio test render next to the real product under neutral light. Colors, glossiness, and printed labels should look identical.
Campaign reuse speed (30 to 90 days): Once the model is built, launching a new ad video, updating a label, or adding a color variant takes days instead of booking another photo shoot.
A worked example
For the NZE Pouch 3D Animation project at cleverpoly Studio, we created a full CGI showcase without receiving any CAD files:
The input: Reference photos of the physical pouch captured on a phone, along with the client's flat print label designs.
The production pipeline:
Modeling from phone photos: Using the phone photos as scale and shape guides, we modeled the pouch from scratch with clean packaging contours and an accurate closure mechanism.
Materials and label mapping: We applied realistic fabric textures and mapped the client's provided label designs onto the 3D surface, then sent look-development renders for approval.
Final stills and macro animation: Once approved, we rendered a 3D CGI showcase utilizing tight macro focus offsets to highlight the fabric weave, seam details, and seamless closure action.
The outcome: Starting only from phone photos and label artwork, NZE received a polished commercial 3D animation and reusable product model ready for digital campaigns.
No CAD Files? No Problem.
At cleverpoly Studio, we build clean 3D models directly from your reference photos, sketches, or physical samples, then turn them into studio stills and commercial animations. Send us a few photos of your product and we will handle the modeling, texturing, lighting, and animation from start to finish.